


Background:
Dad wanted a display model for his office for quite a while. Initial plans were for me to make (or get someone to make) a case for a 1/72 BAe Hawk Mk. 100, which was built last year. The model was rather small, and wasn't impressive. To make matters worse, the decals supplied are of doubtful accuracy. In short, it wasn't good enough.
The plan:
Dad's going off to Tokyo for 12 days or so. Put aside the 1/48 Raptor on the bench. Start and finish the kit, get the glass case done, and put in some sort of tarmac diorama, and by the time he's back, it'll be a rather great surprise.
Ok, so much for plans:
12 days just didn't seem enough to start with, but to be frank, it should be just enough time to get the lot done, if not for the problems experienced. By the 9th day, construction of the whole airframe was done. Well, since plastic is a smooth surface, I thought it was a good idea to spray a gold-tinted bare metal section just fore of the exhaust petals, mask it, then on with RAF barley grey for the whole aircraft.
Unfortunately, the metalliser paint didn't like additives too much, and I ended up with a blotchy lumpy paint finish on the rear section of the model. I thought it'll be covered by the grey coat. Wrong. So it's a case of stripping, repainting, finding blotchy patches, stripping and repainting again. By the time the final coat of paint was sprayed, my dad was already on the way back from Tokyo. My futile attempts to rush the remaining work remained futile, and subsequent enlightenment reminded me that rushing the job just messes it up.
With the IELTS exam looming, work basically came to a standstill. It continued after the exam, and with 1.5 days of easy effort, the model was completed. Even with this delay of about a week or so, this is one of my fastest builds. Although I lost a slight element of surprise in that he already knew this model was undergoing construction, he was blown away when he saw the Typhoon (pun unintended), complete with case on the dinner table. It must have looked impressive, as he peered into the glass case fascinatingly for quite a while.
The case:
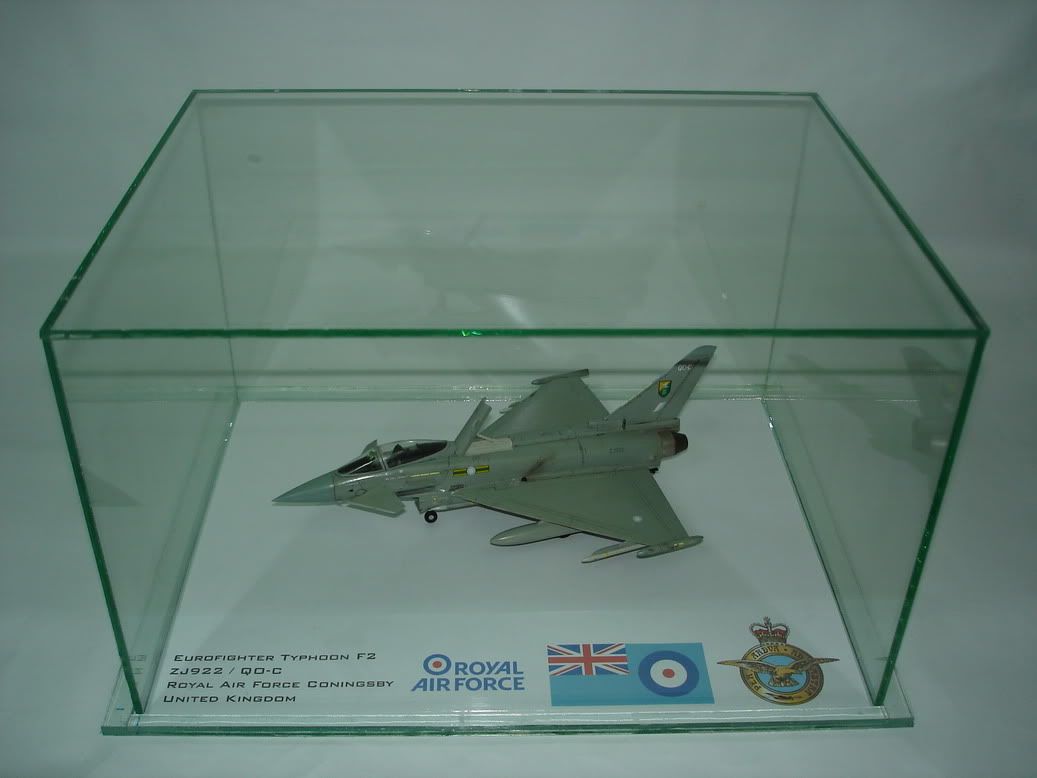
The glass case was made by a friend of my father. Original plans asked for small tight case, with half an inch clearance from all sides, because I didn't want it to take too much space on my dad's desk. The expert knew better, and suggested a much larger case. And he was right. It looks impressive. Although I initially planned for a tarmac base, I settled with a plain background. The aircraft name, base and country, as well as the logo, ensign and emblem of the Royal Air Force were simply arranged on Photoshop.
The model:
Revell of Germany's 1/72 Eurofighter Typhoon. I initially wanted to build an FGR.4 version out of the kit (with the PIRATE sensor fitted) , but subsequent research shows that extra names and stencils were applied post-upgrade. The build was smooth, with most of the seams cleverly designed to be covered by overlying parts. The seat was rather inaccurate, and the ejection seat handle was made with wiring insulation. Putty was used to alter the shape of the cushion. Masking tape strips were used to make seatbelts. For added interest, the airbrakes were shown deployed. The stores on the aircraft are typical for Typhoons on Quick Reaction Alert (QRA) flights, with 4 AMRAAM's, 2 drop tanks and 2 ASRAAM's.
I am not a rivet counter, so I can't really tell whether the model has a panel line 2 degrees off, or whether it is 2mm longer than the real thing. Not many breakthroughs in building techniques etc, except for the use of flattened Future for the final sealing coat. It is a good build, thus highly recommended.
The markings depict Eurofighter Typhoon F2, ZJ922/QO-C of No. 3 Squadron, RAF Coningsby, UK, 2006.
-stcoponegripen-